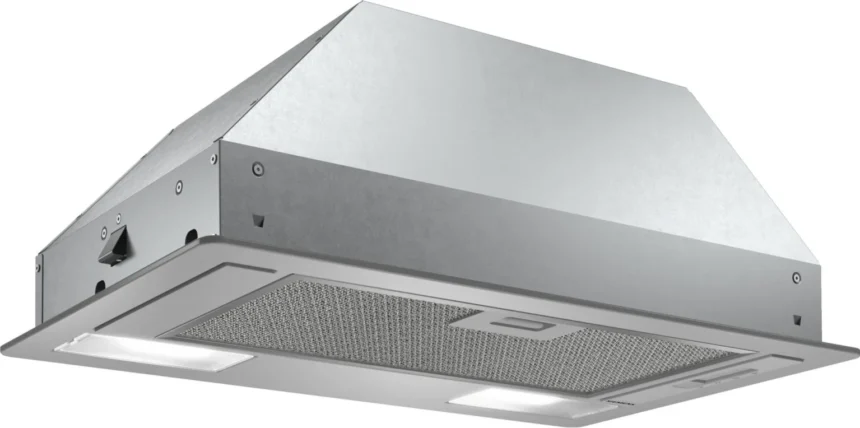
Introduction to the Gelyney Extractor Hood
When it comes to kitchen appliances, the 486 Gelyney Extractor Hood stands out as a true essential. This sleek unit not only enhances your kitchen’s aesthetic but also plays a crucial role in maintaining air quality by removing smoke, steam, and odors while you cook. However, like any appliance, it requires regular cleaning to function at its best. Neglecting maintenance can lead to reduced efficiency and even potential safety hazards.
If you’re looking for an easy way to keep your Gelyney extractor hood sparkling clean and operating smoothly, you’ve come to the right place. In this step-by-step guide, we’ll walk you through everything you need to know about caring for your extractor hood. Whether you’re a seasoned chef or just starting on your culinary journey, these tips will help ensure that your kitchen remains fresh and inviting!
Step 1: Gather Necessary Materials
Before diving into the cleaning process of your 486 Gelyney extractor hood, it’s important to gather all necessary materials. This will make your task smoother and more efficient.
Start with basic supplies like a bucket, warm water, and dish soap. A gentle degreaser can be very helpful for tougher grime.
Don’t forget microfiber cloths; they are perfect for wiping down surfaces without leaving lint behind. You might also want an old toothbrush or soft-bristle brush for those hard-to-reach areas.
Rubber gloves will protect your hands from chemicals while enhancing grip during cleaning tasks. If you have access to a vacuum with a nozzle attachment, it’s great for sucking up any dust that may accumulate around the fan area.
Having everything ready at hand sets you up nicely for each step ahead in this essential maintenance routine.

Step 2: Preparing the Hood for Cleaning
Before diving into the cleaning process, it’s essential to prepare your 486 Gelyney extractor hood. Start by ensuring that it’s turned off and unplugged from the power source. Safety should always come first.
Next, take a moment to remove any decorative elements or attachments on the hood. This makes accessing all areas easier while preventing damage during cleaning.
Cover your kitchen surfaces with old newspapers or towels to catch any drips or debris that may fall during the process. It’s a simple step that saves you time on cleanup later.
If your extractor hood has lights, check if they need replacing before you start scrubbing away. You might want to clean those as well for a complete refresh of your appliance’s appearance.
Once everything is prepped, you’re ready for the next phase in transforming your hood back into its sparkling self.
Step 3: Removing and Soaking Filters
Start by locating the filters in your 486 Gelyney extractor hood. Typically, these are found at the bottom of the unit. They can be easily removed with a gentle pull or push, depending on your model.
Once you have taken them out, it’s time to prepare for soaking. Fill a basin or sink with warm water mixed with dish soap. This solution will help break down grease and grime.
Carefully submerge the filters into this soapy bath. Let them soak for about 15-20 minutes; this will loosen stubborn residues that cling to their surfaces.
After soaking, use a soft brush or sponge to gently scrub away any remaining dirt. Rinse thoroughly under hot running water until all soap is gone. Be sure they are completely dry before reinstalling them back into the extractor hood.
Step 4: Wiping Down Exterior Surfaces
With the filters soaked, it’s time to focus on the exterior of your 486 Gelyney extractor hood. This is where grease and grime can build up over time, affecting both appearance and performance.
Start by using a soft cloth or sponge. Dampen it with warm, soapy water for an effective clean. Avoid harsh chemicals that could damage the finish.
Gently wipe down all surfaces, including buttons and control panels. Pay extra attention to any areas with built-up residue. Rinsing your cloth frequently helps prevent spreading dirt around.
For stainless steel hoods, consider using a dedicated cleaner designed for this material. It will help maintain that shiny look while providing added protection against stains.
Once you’ve wiped everything down, dry the surfaces thoroughly with a microfiber towel. This prevents streaks and enhances shine, leaving your extractor hood looking as good as new!
Step 5: Cleaning the Fan Blades and Motor
Cleaning the fan blades and motor of your 486 Gelyney extractor hood is crucial for maintaining its efficiency. Dust and grease can accumulate here, affecting performance.
Start by turning off power to the unit. Safety first! Once you’re sure it’s powered down, remove any protective coverings carefully.
Use a soft cloth or sponge with warm soapy water to wipe down the fan blades. This helps lift any build-up without damaging them. For stubborn grime, consider a gentle degreaser; just ensure it’s safe for your appliance materials.
Next, dust around the motor area using a dry cloth or brush. Avoid introducing moisture directly onto electrical components to prevent damage.
After cleaning, let everything dry completely before reassembling. A clean fan ensures better air circulation and keeps cooking odors at bay. Your kitchen will thank you for this essential step!
Step 6: Reinstalling Clean Filters
After the filters have soaked and dried, it’s time to reinstall them back into your 486 Gelyney extractor hood. Make sure each filter is completely dry to prevent any moisture from interfering with performance.
Start by aligning the filters correctly. Most models will have guides or clips that help position them properly. A snug fit ensures they work efficiently in trapping grease and odors.
Once positioned, gently push until you hear a click or feel resistance indicating they are secure. It’s important not to force anything; this can cause damage.
Before testing your hood, double-check that all components are back in place securely. This step may seem trivial, but proper installation can significantly enhance the efficiency of your appliance while prolonging its lifespan. Now you’re almost ready to enjoy a cleaner kitchen atmosphere!
Additional Tips and Maintenance
To keep your 486 Gelyney extractor hood running smoothly, regular maintenance is key. Aim to clean the filters every month. This simple task helps maintain optimal airflow and efficiency.
Make a habit of checking for any grease buildup around the fan blades and motor as well. If you notice residue, it’s time for a deeper clean.
Consider using vinegar or baking soda for stubborn stains on stainless steel surfaces. These natural cleaners are effective without being harsh.
Also, ensure that the ductwork is clear of obstructions. A blocked duct can reduce suction power significantly.
Remember to inspect electrical connections occasionally. Any fraying wires or loose fittings should be addressed immediately to prevent potential hazards in your kitchen area. Taking these steps will help prolong the life of your extractor hood while ensuring it performs at its best.
Conclusion
Cleaning your 486 Gelyney extractor hood is not just about aesthetics; it’s a crucial part of maintaining kitchen hygiene and functionality. By following these step-by-step instructions, you can ensure that your hood operates efficiently while enhancing the overall look of your cooking space. Regular maintenance will prolong its life and keep odors at bay, allowing you to enjoy a fresher kitchen environment.
Remember to gather all necessary materials before starting. Preparing the hood properly sets the stage for effective cleaning. Don’t skip soaking those filters—this step makes a significant difference in removing grease buildup. Wiping down surfaces ensures that dust and grime don’t accumulate over time.
When it comes to fan blades and motor cleaning, take care but be thorough. This area often gets neglected yet plays an important role in airflow efficiency.
Once you’ve cleaned everything up, reinstalling clean filters rejuvenates your extractor hood’s performance instantly. Consider scheduling this maintenance task regularly as part of your home upkeep routine.
By investing a little time into keeping your 486 Gelyney extractor hood spotless, you’re ensuring better air quality and improved cooking experiences for yourself and family members alike!