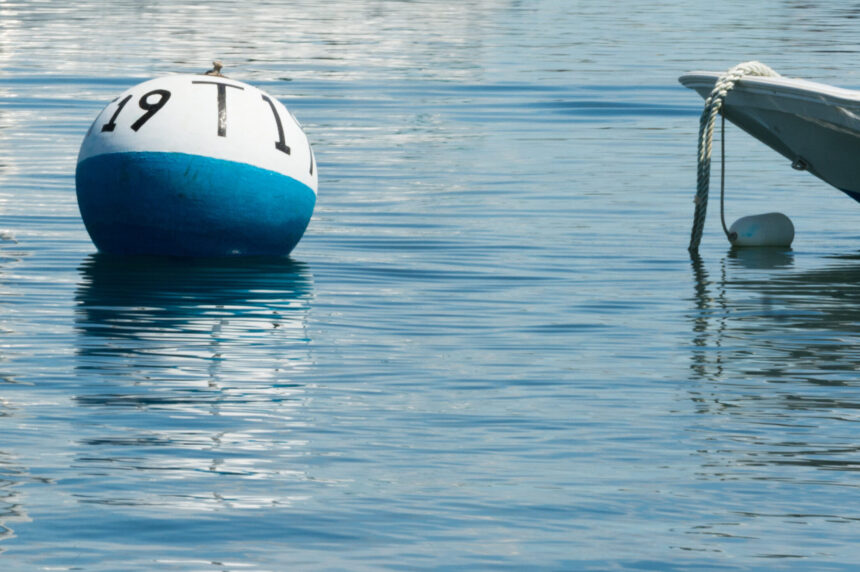
Introduction to Mooring Buoy 13
Welcome to the world of boating where adventure meets tranquility! If you’re a boat owner, you know how important it is to find a reliable spot to moor your vessel. That’s where Mooring Buoy 13 comes in. This popular choice among mariners offers both safety and convenience on the water. Whether you’re planning a weekend getaway or just need a safe place for your boat, understanding how to properly use Mooring Buoy 13 can enhance your experience.
In this guide, we’ll walk you through everything you need to know about setting up and maintaining Mooring Buoy 13. Get ready for tips that will make securing your boat easier than ever before! Let’s dive into the steps required for successful mooring and ensure that every outing on the water remains enjoyable and worry-free.
Benefits of Using a Mooring Buoy
Using a mooring buoy offers distinct advantages for boaters. First and foremost, it provides a secure way to anchor your vessel without the hassle of traditional anchoring methods. This means less time spent wrestling with chains and anchors.
A mooring buoy also reduces wear on your boat. Unlike traditional anchorage that can shift or drag, these buoys hold steady, minimizing movement and strain on your vessel’s hull.
Additionally, they often allow for quicker access to popular spots such as beaches or fishing areas. With a mooring buoy in place, you can easily hop off for a swim or cast a line without unnecessary delays.
Using a mooring buoy contributes to marine preservation. It prevents damage to sensitive underwater ecosystems by reducing the disturbance caused by dragging anchors over fragile habitats.
Step 1: Choosing the Right Location
Choosing the right location for your mooring buoy 13 is critical. Start by assessing water depth and current conditions. Ensure that the area is deep enough to accommodate your vessel without risking grounding during low tides.

Look for a spot away from busy shipping lanes. This minimizes the risk of collisions and ensures peace while you’re anchored. Consider wind patterns, too; positioning your buoy where it can best shield you from prevailing winds can enhance safety and comfort.
It’s also wise to check local regulations regarding mooring buoys. Some areas have restrictions or require permits, so doing your homework upfront saves time later on.
Think about accessibility. A location that allows easy access both by boat and shore will make life much easier when you need to tie up or retrieve supplies. Aim for a balance between convenience and safety in your chosen spot.
Step 2: Gathering Materials and Tools
Gathering the right materials and tools is crucial for a successful mooring buoy installation. Start with a sturdy mooring buoy designed to withstand harsh marine conditions. Look for one that’s visible and durable.
Next, you’ll need a reliable anchor system. This might include concrete blocks, chain, or specialized anchors depending on your location’s seabed type. Don’t forget about high-quality rope or line; it should be robust enough to handle varying tides and weather.
You will also require some basic tools—like a wrench for securing bolts, gloves for protection while handling equipment, and perhaps even a small boat if you’re working offshore.
Keep everything organized as you gather these items. A well-prepared setup gives you peace of mind when it’s time to head out on the water.
Step 3: Preparing the Anchor
Preparing the anchor is a crucial step in securing your mooring buoy 13. Start by selecting an appropriate type of anchor based on your water depth and seabed composition. Common choices include mushroom anchors for soft bottoms or fluke anchors for more stable surfaces.
Once you have your anchor, inspect it thoroughly. Check for any signs of wear or corrosion that might compromise its holding power. A well-maintained anchor will ensure reliability when you’re out on the water.
Next, attach a sturdy chain to the anchor. This adds weight and helps prevent dragging during strong currents or storms. The length of chain should be proportional to the size of the buoy and local conditions—generally, aim for at least three times the water depth.
Connect a robust shackled link between the chain and your mooring line to create a solid bond that can withstand various marine environments.
Step 4: Setting Up the Mooring Line
Setting up the mooring line is a crucial step in ensuring your buoy remains stable. Start by selecting a durable, marine-grade rope or chain that can withstand harsh conditions.
Attach one end of the line to the mooring buoy’s designated cleat or ring. Make sure it’s securely fastened using appropriate knots like a bowline for strength and reliability.
Next, run the other end of the line to your anchor point onshore or at another designated spot. Ensure there’s enough slack for tidal changes but not so much that it compromises stability.
Regularly check for wear and tear on both your buoy and mooring line. This simple maintenance task can prevent costly damage later on.
Remember, proper tension is key; too tight may strain components while too loose could lead to drifting issues during rough weather.
Step 5: Securing the Mooring Buoy
Once you’ve set up the mooring line, it’s time to secure the buoy. This step is crucial for ensuring that your vessel stays stable and safe.
Begin by attaching a strong, durable shackle to the top of the buoy. Make sure it fits snugly and won’t easily come undone in rough waters. A good connection here can prevent a lot of potential headaches later on.
Next, thread the mooring line through the shackle before tightening it down securely. Double-check everything to make sure there’s no slack in the line; you want it taut but not overly tight.
Consider adding a float or marker near your buoy if visibility is an issue. This ensures other boaters can see it clearly, reducing risks of collisions or tangling lines with their vessels.
Tips for Maintenance and Inspection
Regular maintenance is crucial for the longevity of your mooring buoy 13. Start by visually inspecting the buoy for any signs of wear or damage. Look closely at its surface and ensure there are no cracks or chips that could compromise its integrity.
Check the mooring lines frequently. They should be free from fraying, knots, or other obstructions. Replace any worn lines immediately to prevent issues when securing your vessel.
Periodically inspect the anchor system as well. Ensure it remains buried securely in place and hasn’t shifted over time due to currents or weather conditions.
It’s a good practice to clean your buoy regularly too. Remove algae, barnacles, or debris that may accumulate on it, which can weigh it down and affect performance.
Keep an eye on local environmental factors such as storms or heavy winds that could impact your setup. Stay proactive in maintaining safety measures and functionality.
Safety Precautions when Using a Mooring Bu
Safety is paramount when dealing with a mooring buoy. Always check the weather conditions before setting out. A sudden storm can make anchoring difficult or dangerous.
Ensure that your boat is equipped with safety gear such as life jackets, flares, and a first-aid kit. These items are essential for any unexpected situations.
When approaching the buoy, reduce your speed to avoid damaging both your vessel and the buoy itself.
Inspect the mooring line regularly for wear and tear. A frayed line could lead to disaster if it breaks during rough waters.
Make sure everyone on board understands how to use all safety equipment properly. Knowledge can save lives in critical moments.
Always have a plan in case of emergencies while anchored at a mooring buoy. Communication should be clear among crew members about procedures and signals.
FAQs
Setting up a mooring buoy can raise many questions. Here are some common inquiries regarding Mooring Buoy 13:
What is a mooring buoy, and how does it work?
A mooring buoy serves as a floating anchor point for boats. It allows vessels to be secured in place without dropping an anchor, minimizing damage to the seabed.
How do I know if my location is suitable for Mooring Buoy 13?
Look for areas with adequate water depth and minimal current or wave action. Ensure it’s far enough from other boats and navigational hazards.
Can I install a mooring buoy by myself?
While DIY installation is possible, having someone experienced helps ensure safety and proper setup.
What materials do I need for installing Mooring Buoy 13?
You will require the buoy itself, heavy-duty rope for the mooring line, an appropriate anchor weight (like concrete or sand), and tools such as gloves and perhaps a boat hook.
How often should I inspect my mooring buoy?
Regular inspections every few months are advisable. Check for wear on lines, corrosion on metal parts, or any signs of deterioration in the buoy itself.
Are there specific regulations regarding using Mooring Buoy 13?
Yes! Always check local laws or maritime regulations before installing your buoys to ensure compliance with safety standards.
Mooring buoys offer convenience but also come with responsibilities. Understanding their function enhances boating experiences while ensuring safety on the water.
